Well, another day, another shot at my scenery. After my Friday failure with the glue not soaking through and creating a crust surface, I ripped out the worst affected areas where I could get a finger in and pull away the soil base scenic material, and tried again.


Three areas where the glue did not work, I was able to literally pull the scenery up in chunks with my fingers once I got into the cracks, not good.
I spent a half hour on Saturday looking at the places I had put down scenery on Friday, about 1/3 of it I was able to peel right away with just my fingers once it started to come up, revealing unglued soil below. These were admittedly thick layers, but not the thickest I’ve done. There were a couple of differences in my technique looking back. In the past, when I’ve applied large layers, they were often on top of a coat of latex house paint to give some ground colour to the foam beneath. This also helped adhere the bottom layer of soil to the ground, and when wetted from above, the paint thins and eventually wicks up while the glue wicks down.


Attempt number two, a good clean and service on my sprayer bottle for water to pre-wet the soil for the thinned glue to be applied, and immediately more obvious that the glue was soaking in rather than sitting on the surface.
I have to admit, I am also guilty of recently having used my water spray bottle with some super thinned glue in it as well. On inspection, I was not getting a good spray as the nozzle was definitely a little bit gooped up. It looked like I was getting a good spray, but I think I was almost certainly only wetting the top of the soil, and it wasn’t soaking all the way through to help the thinned glue flow in when it is applied.
My second go around on Saturday, a lot more water was used to get the area wet, and the glue discernibly soaked in immediately rather than pooling on the surface.


Sunday morning, looking much better. A couple of very small cracks, but it is holding unlike Saturday morning where it pulled right up. I can work with this.
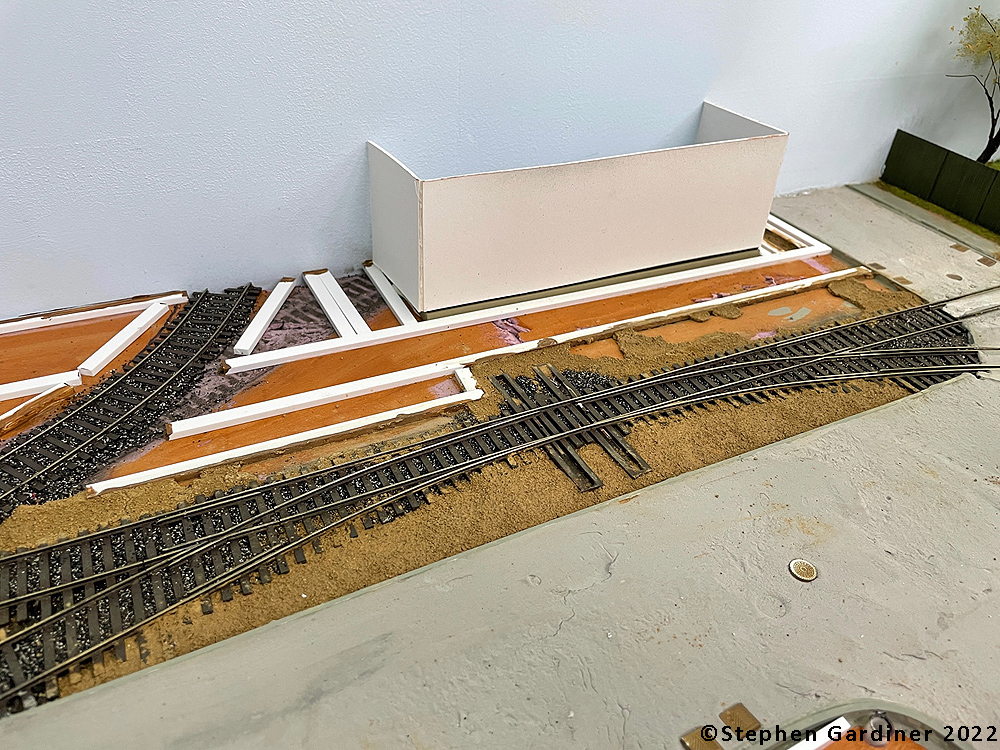
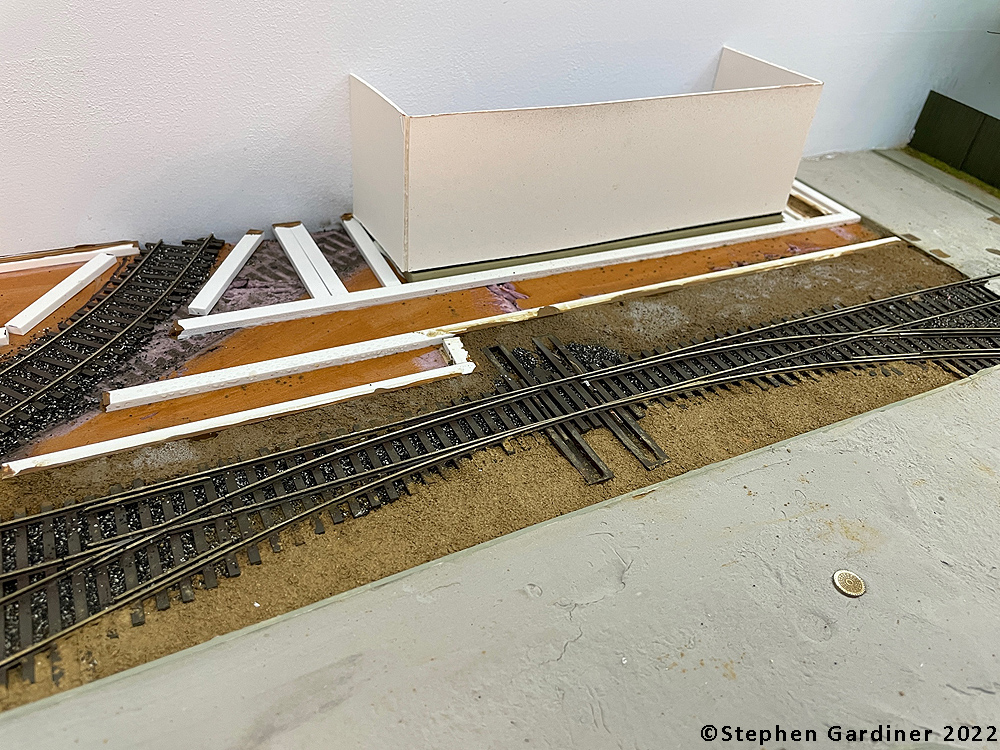
All these areas will need a second top coat. As you can see from the pictures, there are areas paved with styrene that are still sitting proud of the ground level. Another thin level of dirt that hopefully adheres better to blend the ground together once the styrene pavement is actually glued down, and hopefully these areas will be ready for more “finish” scenery with some static grass and weeds and such. Live an learn, I probably should have recognized that the glue wasn’t seeping in properly, but at least it’s a recoverable mistake.

Hooorrrrrayyyyy! All things are fixable in railway modeling! I truly believe this
Rick
I use straight 70% rubbing alcohol for wetting my scenery, sometimes sprayed on and sometimes applied with a pipette, and have never had a “crusting” occur. Alcohol costs more than water, but not that much more, and it lets the glue wick into every little bit. I also use homemade matte medium solution (with a little bit of alcohol mixed in as well) and it soaks in nicely. Just a though.
Fantastic update! So exciting to see this and what a relief eh?
My creative imagination is inspired by the potential of: “and when wetted from above, the paint thins and eventually wicks up while the glue wicks down”! As a part of weathering scenery I have in my mind this idea that somehow grass or long foliage like this should have a fade of its colours or textures as it gets closer to the earth–as if they need to share colour and texture. So if the paint is softening it contributes some adhesive value to the help the glue coming in from above but also could help dye the materials being bonded over it. Think I need to play with that idea.
Chris