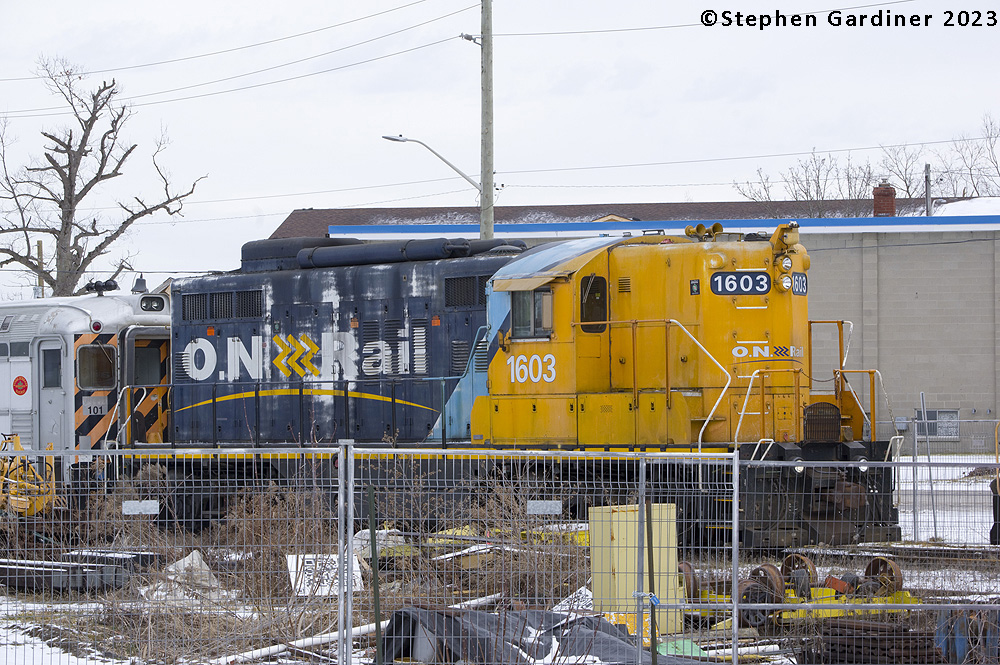
Ontario Northland in the south! The York Durham Heritage Railway has leased Ontario Northland Railways GP9 #1603. It is certainly old enough to be “retired” to a heritage railway or museum, built in 1956, it is only 5 years younger than ex-Ontario Northland RS-3 1310 parked beside it which was built in 1951. The YDHR is still recovering from damage sustained during a tornado which struck it doing significant damage in mid-2022. I’m not sure when they are going to actually be running trains again, but hopefully soon as I wouldn’t mind getting shots of 1603 out working, rather than behind the fences as they work to reconstruct after the storm.
More shots of 1603, 1310 and an ex-ONR coach with the old Polar Bear Express logo below.
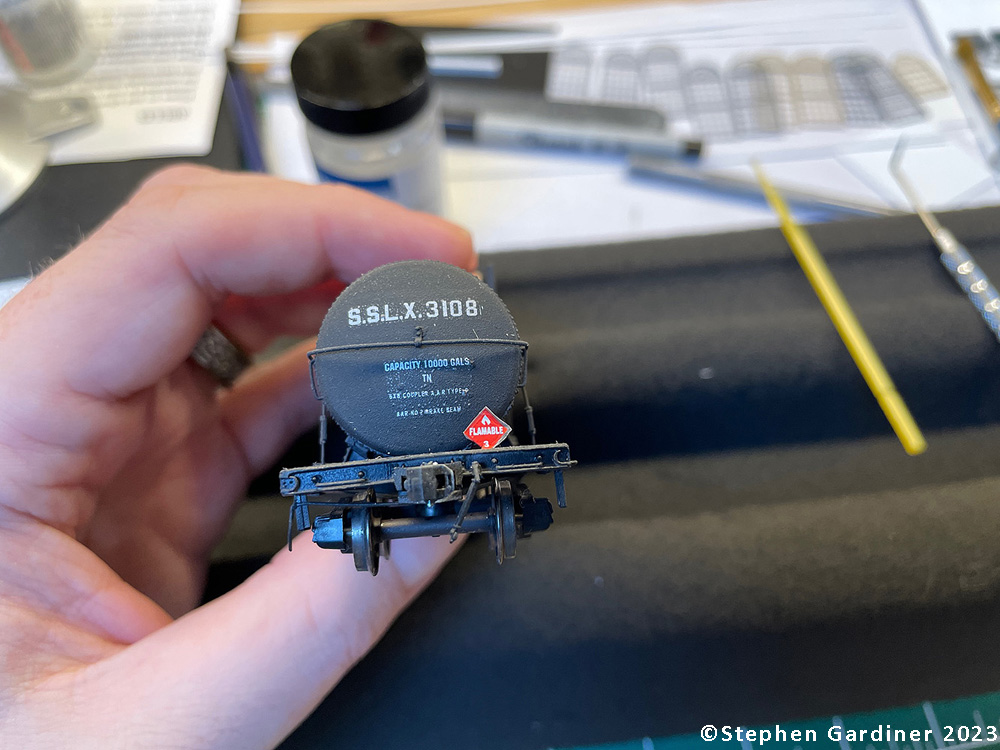
Decals that never settled, even with multiple coats of Microscale Microsol, but settling nicely with an attack with an xacto knife and stronger Walthers Solvaset.
Recently, I got together with friends for a gathering at my friend Hunter Hughsons. It was the first time I’d gotten together with modellers since our 2020 Febraury meetup in his basement. Funny that right? One of my friends there passed on a tip. Ryan Mendell and I brought the same car amongst our projects, the Solway-Semet car by Yarmouth Model Works. Pierre Oliver who runs Yarmouth had left by the time we retreated to the basement to look at models after dinner, but Ryan gave a tip he got from Pierre, as some of my cars had decals that had just refused to set. He said, get a stronger setting solution than Microscale MicroSol, like Walthers Solvaset. Then, take an Xacto knife, and just poke at the decal hundreds of times to make tiny holes where it hasn’t settled. Then, apply the Solvaset, and let it work. It may still take multiple applications, but 100% even after a single application, decals that I had all but abandoned hope of getting to settle down properly, were settling and the carrier film disappearing. The small victories! I still have 8 or 10 cars to go back and work on, but this simple fix has made me very happy!
What says winter in Canada more than playing shinny on a frozen pond/lake/river. In this case, a back bay portion of Burlington Bay in the Royal Botanical Gardens as CN Train 422 makes its way from Hamilton to Aldershot to work en route from Port Robinson to Macmillan Yard in Vaughan.
I’m learning to fly But I ain’t got wings Coming down Is the hardest thing
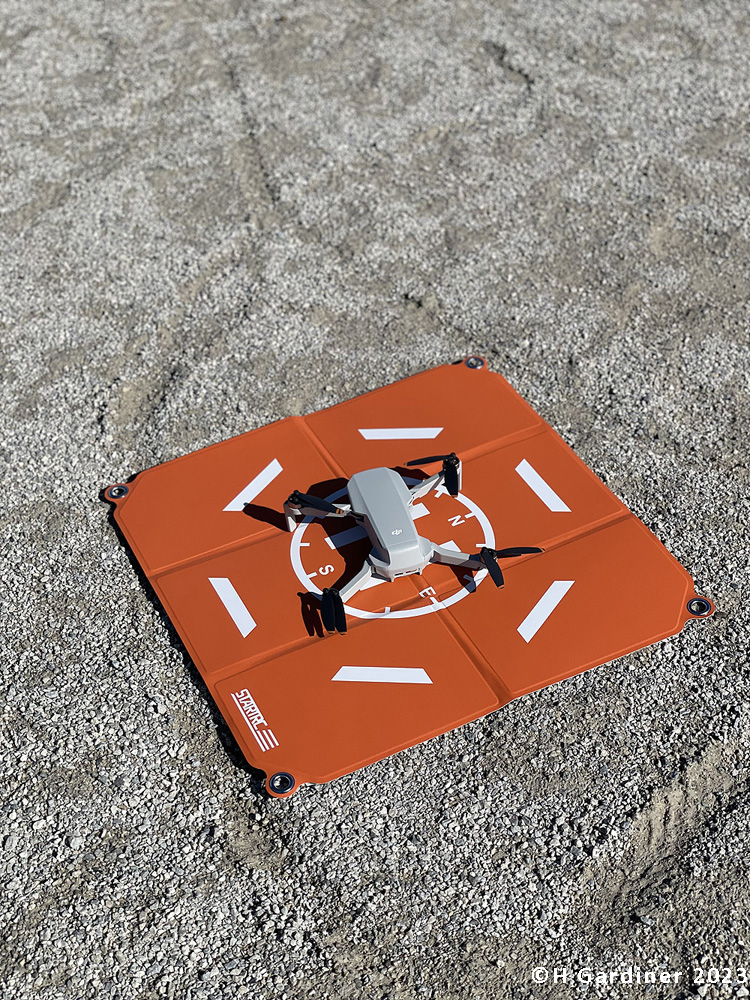
Yesterday I got my drone, today, I started to learn to fly it. In the interests of my sanity, and not breaking it on the first day, we went over to the public school yard a ten minute walk across the street, a nice wide open space where I could set up in the ball diamond gravel, and have it and the expanse of grass that is the soccer field to fly over and not be buzzing anyone’s house, flying into trees or wires, or any other pratfall that would ruin my first day out with it.
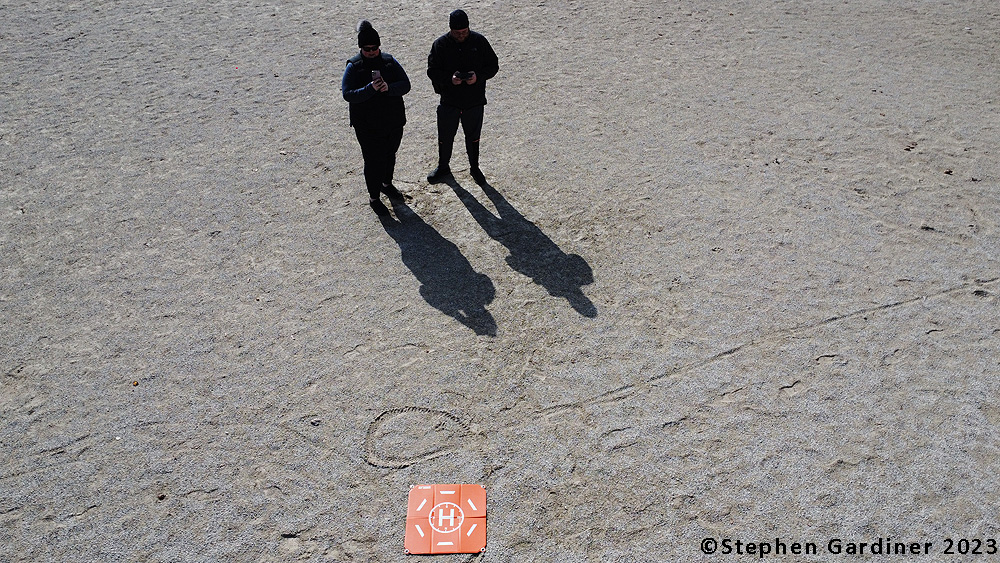
Getting set to go, and a collection of shots from the Drone looking back at us, and of the area around the school we were flying at. For a tiny lens, the camera gets good shots with the 12megapixel sensor it has.
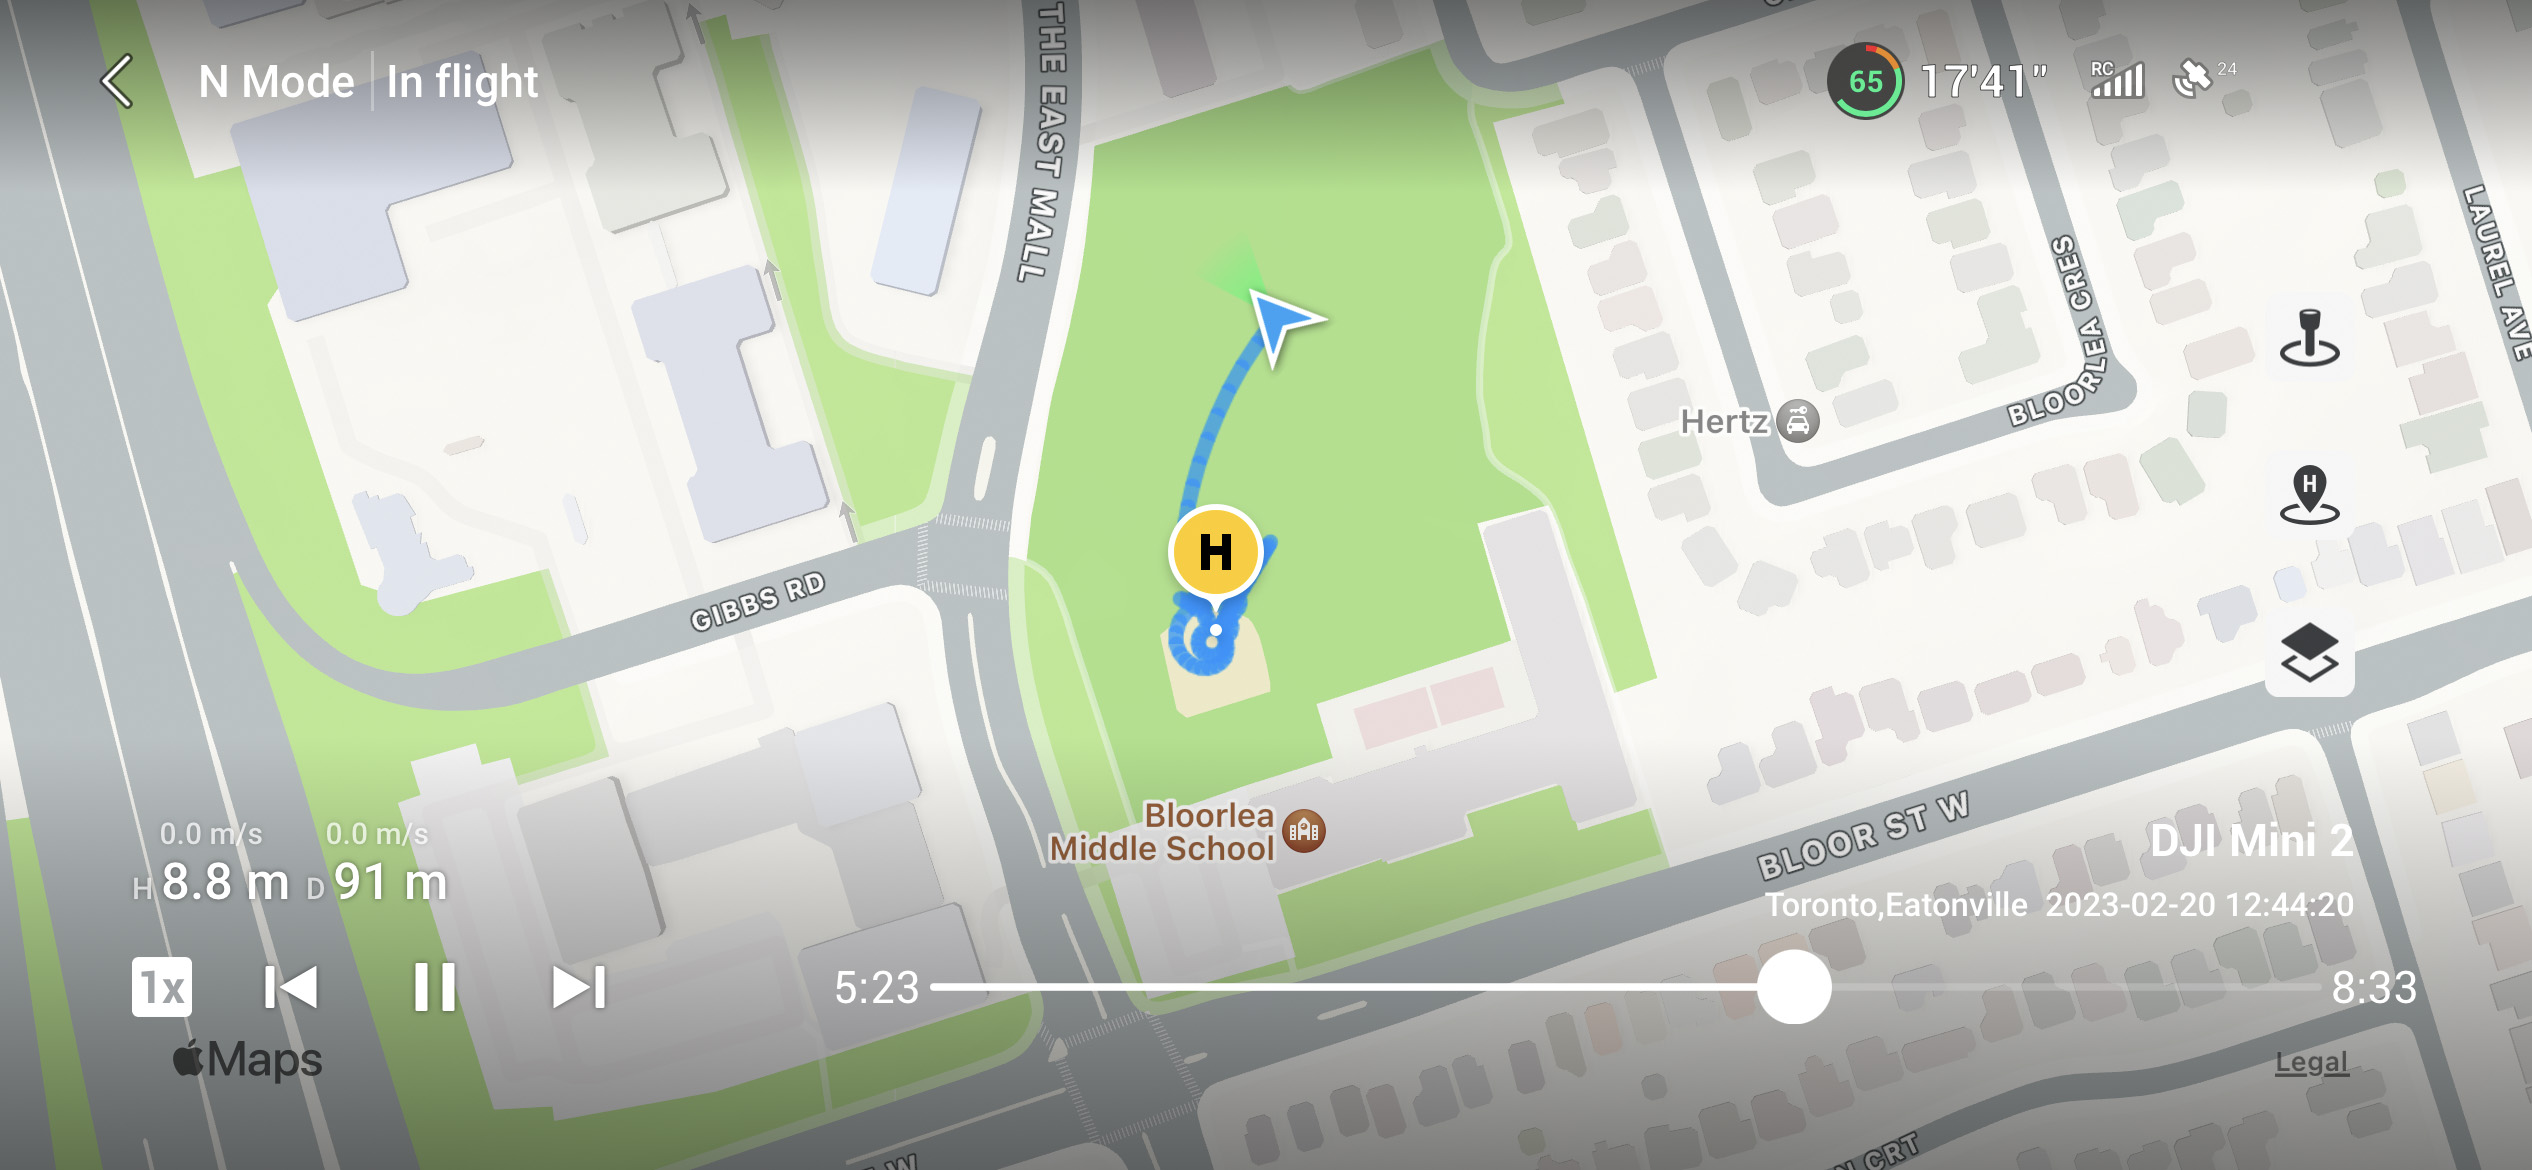
This was, a basic get to know you series of flights. Use the auto takeoff and auto landing features. Do the same manually, see how the “Quick Shot” pre-set flight patterns for videos work, and start to get a hang of the controls. I even managed to fly it far enough away that we lost sight of it in the skies, so we tested the “Return Home” GPS feature to have it automatically fly back to where it took off from. I did not play around with settings much. One I will need to look at is the Return to Home and its default altitude. It was just windy enough today, that the default of 400′, which is set to clear anything around normally, once it got back close and we spotted it, it was clear it was fighting the wind, so instead of letting the auto return finish, I reclaimed control and brought it back down to almost ground level and flew it back to base. That said, my initial impressions are, wow. A number of people I know with them said that they are super easy to fly, and they were not kidding. Even as I was fumbling to get a feel for which movement on the control sticks does what, the video I was getting was so steady.
Post fly about screen caps from the DJI App, listing of all my flights, and you can go back in and view your flights on a map, review what controls you did, etc. This was the furthest away from myself that I got (we couldn’t see/hear it in the sky).
I assembled a brief video of the days flying, a combination of footage from in the Drone, and from my wife’s iPhone of me flying it. I have to say, I am really impressed that even on a first flight, the video and photographs are really good. I can’t wait to get some more flight time in to get really comfortable with how it flies and moves, and get out trackside with it to get a new angle on some trains!
As always, when my wonky musical mind starts with a song, I leave you with the late great Tom Petty & The Heartbreakers “Learning to Fly”
Oh dear…I appear to have given into temptation for a new “toy”…er em, tool, in my train chasing railfan photographer arsenal. After some months of thinking about it, and mulling, I have broken down and bought a DJI Mini 2 Drone. I have, been feeling stale in my photography and videography of late, and looking for new ways to open up opportunities, I have settled on trying out a drone. I have a number of friends who have drones, and I know a few other railfans (Steve Boyko in Winnipeg springs to mind, his work well worth a look compared to mine if you haven’t seen it). This one came highly recommended as a first drone for new users. It is, apparently easy to fly and easy to learn to fly, and takes good quality video and pictures. I am planning a trip in early May to go and do some railfanning and riding of passenger trains in places well away from home (all in good time, that’s a bunch of future posts), and I have decided that I want as many tools in my bag as possible for this, and the Drone is going to be one of them. Once I decided I was actually going to do the thing and order it, I wanted to do it plenty early so I have two months+ here to learn to use it, and see how I integrate having it with me into what I do when I am out and about.
Oh my…what have I gotten myself into…
My drone arrived yesterday, and after some quality efforts by the staff at our Condo to lose it in the parcel room, I got it home this afternoon. I have successfully fired up the software, linked and registered the device, and confirmed the camera works, by taking a really bad selfie while the drone was sitting in my photo cube (no I won’t be sharing that thanks for asking!). So far, I would say everything has been reasonably intuitive and has worked the way it should. I am hoping to go over to a school down the street tomorrow where there are some wide open spaces to set up and learn to fly. While to get good use while chasing trains, I will need to learn to fly around obstacles and miss things, at least for learning basic operations like how to take off and land, and where all the different control settings are, I figure a wide open space is probably the way to go!
DJI Mini 2. It is about the size of two HO Scale 40′ boxcars side by side with the rotors folded in. No I’m not making my first test flight in the house, that has disaster written all over it.
Future updates on my Learning to Fly will follow in due course…once the batteries finish charging…
Welcome to a new occasional thought feature, “Throwback Thursdays”. This won’t be every week, or even every month, as I don’t have the time, or necessarily the pictures. Recently, while my friend Trevor Marshall and I were trying to enable Chris Mears to buy a Wisbech and Upwell tram pack from Rapido Trains UK, I sent a picture of my three streetcar models, and Mears being an observant sort, instead of doing as he’s being told and buying trams, started asking questions about one of the models on my shelf, an HO Scale CLRV Streetcar. From that, the genesis of an idea, I have, built plenty of models over the years before I had the Liberty Village Layout, and before I started the blog. Some I still have, some have gone to new homes, but sometimes, to understand where you are going, it helps to look back a little bit on where you have been. So with that, I hope you enjoy this look back at a project from 2012.
You send a guy one picture of a trio of streetcars and where does it lead you…
So, to the past project at hand. I have been an active volunteer in some form at the Toronto Railway Museum since 2009. Sometime in 2011/early 2012, a fellow volunteer one day gave me a bag of bits and pieces, saying he would never build them, but he knew I would (Thanks Jim G!). Inside the bag, were a Miniatures By Eric/Customtraxx resin kit for a Toronto Transit Commission CLRV Streetcar. The bag had just the resin castings and clear vacuformed front and rear windows. No frame or wheelsets. Customtraxx sells a cast metal floor and Bowser trucks and wheelsets, as well as Decal Sets for the CLRV Cars.
Before I get into the model build, what is a CLRV? For anyone who doesn’t know, they are a Canadian designed and built streetcar, the Canadian Light Rail Vehicle (CLRV). They entered service in 1979, pushing the older Presidents Conference Cars (PCC) to the scrap lines, and were the face of the TTC Streetcar system along with their larger articulated cousin the Advanced Light Rail Vehicle (ALRV) until 2019, when age, mechanical failings and the need for accessible low-floor vehicles which were finally being delivered replaced them. A number have been preserved in Canada and the USA, and the TTC has kept a couple for their historic fleet. Pictures of my last day chasing them can be seen in Tuesday Train #177.
CLRV 4193 working on December 28, 2019. One of five that would end their days in service the following day, December 29th.
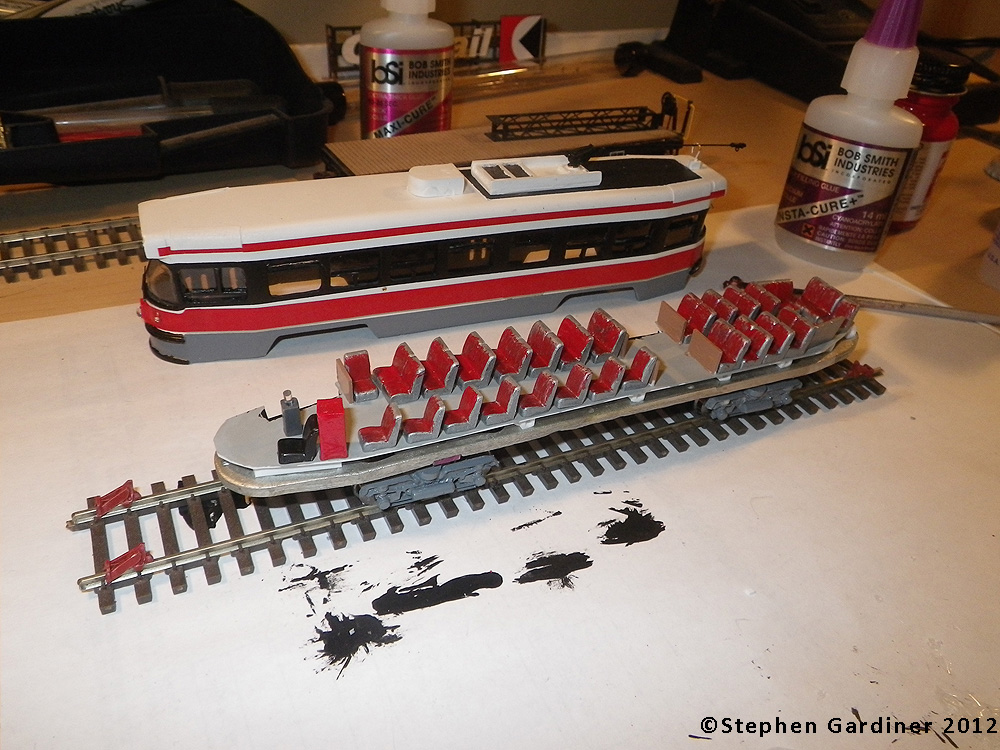
So, back to the model. I had heard tell of this model, and while having a model of a modern TTC Streetcar like I rode almost every day when my office was downtown was a strong desire, I wasn’t in the market to go buy the kit. Having half a project gifted to me was a good way to get me to go out and buy the bits and pieces I needed for the rest of it! It could be built and powered, but being a nut, I decided that I would rather do a fully prototypical interior, as I had no need for it to be powered, I didn’t at the time own any other streetcars, and had no plans to ever build a streetcar layout. With that decision made, once I had the frame, and got the trucks mounted, I built a fake sub-floor, and using plastic chairs, started to construct an interior.
Gallery of the kit being built.
The kit, which no longer seems to be available anymore is a bit of a beast. The castings are heavy yellow resin, which don’t sand well, and the body has a slight bow, along with some not 100% correct shapes, but it is close enough with some care in construction to create a more than passable CLRV. I understand that powered versions of these are running at Little Canada, the HO Scale layout attraction at Yonge-Dundas Square in Toronto that I still need to visit someday. To paint the cars, I painted a white base, then the black window strip and the grey lower quarter. The decal sets included the red body and window top strips. If memory serves, the TTC logos where integral to the strips, and would have been a real pain to paint the red and make the decals work.
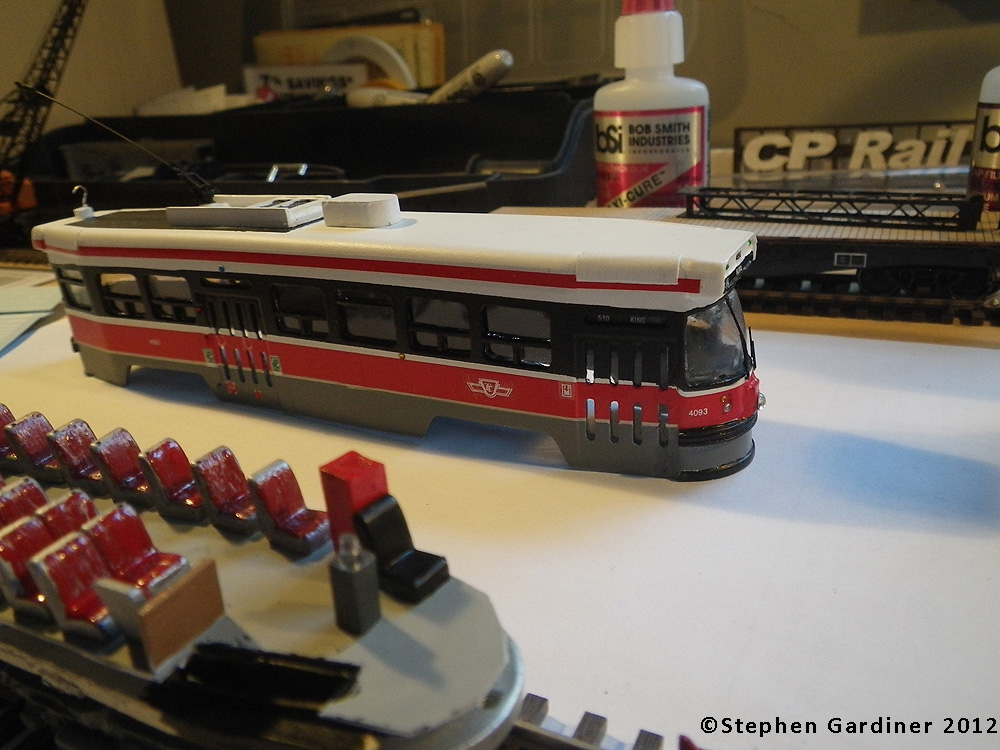
Painting and decalling. The red were all provided as decals, I think If I was building it again, I would paint the stripes. First shot shows the full interior of the car.
I chose a car number pretty much at random (OK, so I chose one of the two 93’s as a mini tribute to one of my favourite Maple Leafs players and a Blue Jays World Series win…). At the time, my office was at King and Blue Jays Way, so I would often take the subway to Dundas West Station, then take the 510 King Streetcar to my office, so I put the car on the 510, and added the dreaded short turn board, a flip up metal plate that operators were supposed to flip up when Transit Control told them they were terminating their route short of the actual destination to go out of service or turn back the other way.
The finished model of 4093 on the 510 King Streetcar with the short turn board (a bane of TTC riders) flipped up.
So, with that, the end of my first look down memory lane at a past project from before the blog. Strangely, as I am often distracted by shiny things, I have actually considered building an IKEA Bookcase shelf layout with a little bit of a Toronto Streetscape for displaying the streetcars in a more natural way. Maybe I’ll be back here again someday in the future.