For the Canyon Road diorama, I am trying to re-create the feel of train watching at this location. Part of that is the sights of the wood bridge and the Niagara Escarpment in the background. I think, I am making good progress in re-creating the feel of these aspects. One thing that I had not thought about was the sounds, the track is wired, so I can connect it to power/DCC to light the locomotive and get loco sounds, but what about other sounds? Background sounds as part of the scenery is something I have seen done on a layout scale, and which I am interested in down the road for Liberty Village, but what sound dominates this scene? Well, to be honest, when you are standing there taking pictures, the most dominant sound other than the train, is the crossing gates electronic bell.
I was killing time browsing the internet a couple of weeks ago looking at train stuff and model parts, and I was on the Iowa Scaled Engineering website drooling over Protothrottles, when I noticed a new-ish product, the Soundbyte. A small, integrated circuit with a speaker and enclosure, with pre-recorded bell sounds. It has options for a generic bell, and 7 real world recordings. One of the real world recordings is a Western-Cullen-Hayes 777 Electronic Bell, which is the bell at many crossings in Ontario, and certainly sounds like the one at Canyon Road when I listen to my videos.
The Iowa Scaled Engineering soundByte. In its package, out of the package, and wired up to a 9 volt battery and switch.
The Soundbyte runs on 5 to 24 volts, so it can be connected to a variety of power supplies. In my case, for a portable diorama, a 9volt battery is the simplest solution. It was a simple five minute project to wire up the battery clip and switch. Red to positive, black to negative, and white with the switch to negative as well. With this done, the Soundbyte has a small volume control, to adjust the sound from quite loud, to rather soft. I have set it fairly soft for in the house, but once I figure out how to install it into the diorama, I can adjust it further. I am thinking, at this point, I will hollow out the underside of the foam hill the bridge lands at, and create a little cavern in the back to mount it into where it won’t be seen. I have to figure out the best way to do this, but I’m sure that will come to me in time.
Video of the Soundbyte. Sounds like you’re at a crossing gate.
Iowa Scaled Engineering currently also offers a Cicada Soundbyte, which is not a sound I want on Liberty Village. That said, these are a nice option if they could be programmed with generic city noises. Car horns, traffic, factory sounds, etc. At some point I will have to reach out to them to see if they have interest in expanding the line to other ambient sounds that model railroaders may be interested in.
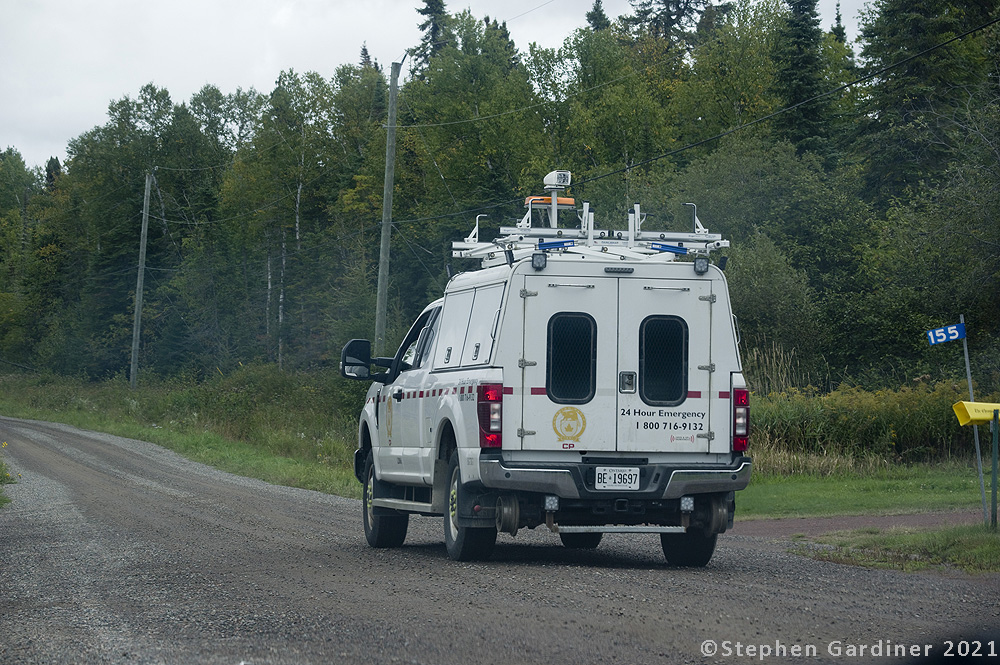
Oh Canadian Pacific, how you like to troll me…in mid-September we took a week away to Northern Ontario. We spent 3 nights in a Cabin at Sleeping Giant Provincial Park outside Thunder Bay on Lake Superior. One of the days, when it had been rainy in the morning, I went off around lunchtime to the CPR Nipigon Subdivision to see if I could get lucky and photograph a train in the north. I arrived, and through some online help, I knew a train had left White River heading west at 6:30am, I was trackside around 12:30pm, at Loon, give or take 120 miles and one division point stop from White River. On slow and curvy northern tracks, and with a potential meet, about 6 hours to cover that distance seemed fair, so, I settled in in the hopes that I would catch something, in traditional CPR fashion, the first thing I got in the middle of nowhere (sorry residents of Loon), was a CPR service truck above. Not a positive sign, but he came and went quickly. Then, the signals at the east end of Loon, which had been dark, lit up red, something was coming from the east.
Soon, through the hills the sound of horns for a crossing to the east, and the rumble of diesels as CPR Train 113, a westbound intermodal appeared around 1:45. or 7 hours after leaving White River, success!
Weathering, the Final Frontier? I don’t know about that, but Weathering my models is one of the things I do not have a lot of experience in. Weathering brings a model to life, it looks used, as things in the real world don’t look perfectly clean for long. Rain, dust, snow, rust, graffiti and general use all take a toll, and tell a part of the story of the railway equipment you are modelling. I am modelling the 1950’s (on my main Liberty Village layout), which for me, means more grime, dirt, and use than rust and graffiti, though rust still existed, pictures from the era show cars that did not look as rusted as many cars today do. I have seen people speculate online that this was the lead in the paint used back then, I don’t know, but I do know that for most of my weathering efforts, I need to work on learning to create the look of used equipment that has been out in the world travelling, not getting spray painted and rusting out.
I have made some friends over the years who are much more experienced at weathering, and through me asking them pesky questions by email/text, or watching Videos they have made in the past on the Trainmasters TV subscription site when I had a subscription, I feel I have a good breath of techniques to try, and a decent understanding of how to do them to achieve my goals of making my models look more realistic. There are all kinds of techniques out there. I have also got a number of British Model Magazine “Bookazines” and Volume 1 of George Dent‘s books on weathering. I think, I have plenty of reference material and technique direction, I need to get on with doing it. Most of what I have been trying this week are techniques learned from Pierre Oliver of Yarmouth Model Works, so thank you up front Pierre, I can lay no claim to coming up with any of these ideas, only to learning them from you and now sharing them and my experiences learning to apply them with others.
Some of the supplies for my Weathering efforts. Panpastels have labels the bottom of their packages, not great when you have them open, so I have labelled them with the label maker! Other supplies photographed above are described below.
So, in the pictures above are some of the supplies that have been recommended to me, that I’ve seen used in videos/articles, or that I’ve bought on my own for past efforts. This is not all that I own, and certainly not everything you can use to weather a model. It is just a sampler of the many different things out there you can use. In the pictures are Panpastels, a powdered paint I have written about before. It comes in many shades. In my collection are some of the colours useful for creating dirty effects on equipment, buildings and roads. You can apply them, work them in, move them about, and they stay changeable. You do need to spray them with a clear coat if you want to hold them in place permanently. Next up, is another pair of powdered products, a MIG rust powder, and a set of Bragdon Weathering powders. The Bragdon powders have a fine powdered adhesive in them, so they can stick to an extent without being clear coated. It doesn’t hurt to clear coat after you apply them to fix them in place, but sometimes in an area that won’t be touched, you can get away without it. After that, is pre-mixed washes, there are a wide range of enamel and acrylic washes out there, from military modeller focused firms, to war gaming/miniatures ones. They all have their uses, as long as you are careful in understanding how they behave. The Acrylic ones for example, dry really fast. You don’t get a lot of working time to move them around and get them the way you want. The last two images are different oil paint products, some “Oilbrushers” from MIG, which are oil paints that have a fine brush built into the cap, and then some tubes of traditional oil paints, again in the range of dirt and grime colours needed for weathering. Not pictured, are a set of pre-mixed paints for weathering from Iwata Com Art, the “Real Deal Weathering” set. These were something I found from Pierre Oliver in a Trainmasters TV Video, and they are excellent, super thin, ready to airbrush straight from the jar. Another tool in the toolkit needed for working with the oils, is Odourless Turpenoid, for streaking, but I will get to that when I talk about techniques shortly.
I want to make it clear, I have built up this supply of stuff over time, some have been recent purchases as I am very much committing myself though this coming winter to try weathering more seriously, and applying the techniques I have read and watched videos about. You certainly don’t need all of this stuff, you can and should try things, and see what works for you. That is definitely what I am doing, and have done this past week as I have started to actually try and do some weathering.
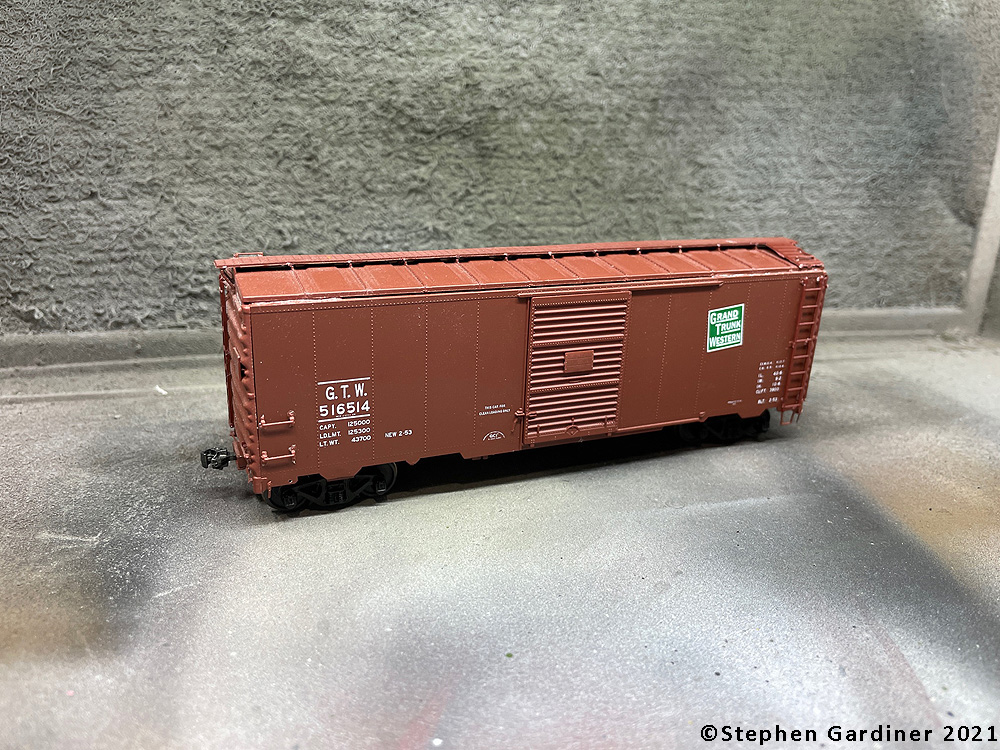
An older Branchline Trains box car in my collection, that has seen better days, a lot of parts are broken off, the perfect car to practice weathering on!
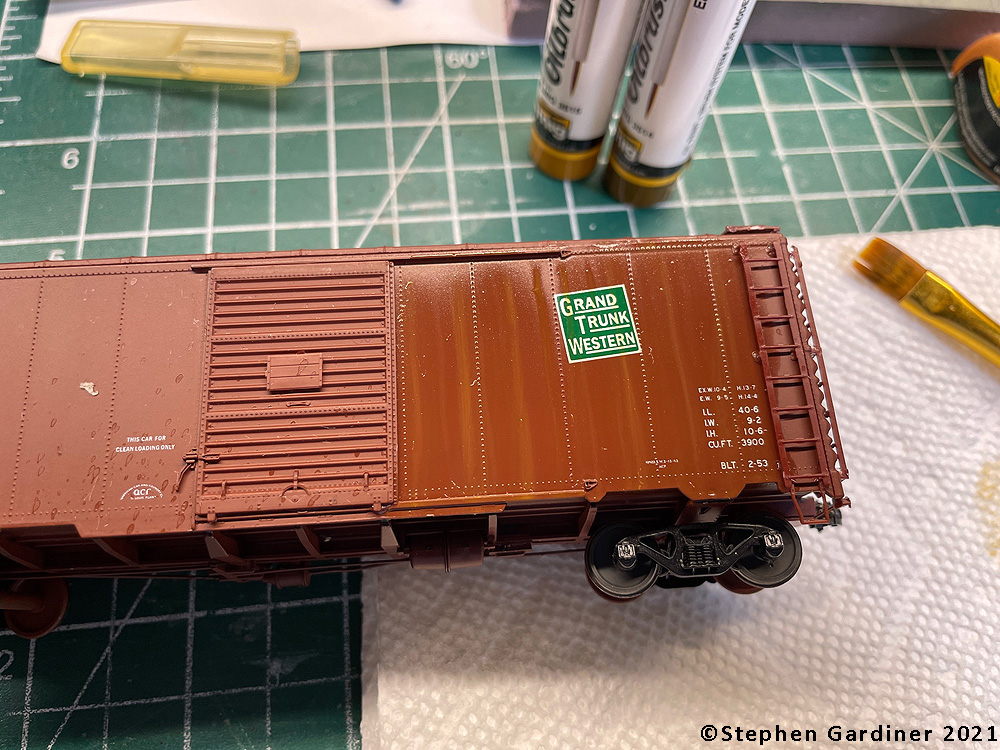
First up was to try streaking with oil paints. I have some older boxcars from my old layout, they aren’t actually bad kits, though they were built at a time where I was not good with glue, and have been a bit beaten up over the years, there isn’t really anything wrong with them that I couldn’t fix, but it is a good candidate to practice on. I figured, it has two sides, and 4 quarters when you look at it, so I can mess around a bit. The first think I wanted to try, was streaking with oil paints. The first 5 pictures above show this, the clean car, then with dots of oil along the top of the side from the MIG Oilbrushers, followed by washing the colours down the side using a wide brush with odourless turpenoid on it. My first passes, I am not good at getting my motion with the turpenoid vertical, my streaks were wavy lines. This is where the oil paints are so great for weathering, just keep working, as my strokes got better, the paint keeps moving until I did have vertical stripes. The 3rd photo shows the wet car side after working for a bit. The 4th shows after it has dried, and the 5th shows the effect of a streaked vs an unstreaked end on the layout lighting. Even this simple bit of grime makes the car look more like its been used.
The final two shots show the other side of the car in my paint booth. I wanted to try some basic airbrush weathering to get some dust and grime, and help bring out the detail in the car. For this, I used the pre-thinned Iwata paint set, spraying white along the bottom and top faintly first, then adding some dirt colours. Even just a couple of coats takes the shine off and adds a look of being used to the car. I still need to practice some more, my airbrush technique at getting a faint and consistent coat is not good. Not sure how much of this is me and how much is the condition of my airbrush. Looking at a new airbrush has been on my list for a while, I am nearing the point where I think it may be reaching the top of the shopping list, but that will also distract me from doing by fretting about what to buy and how much to spend on it!
Working on weathering a Rapido 53′ Gunderson Well Car. Track Painter Marker and powders on the trucks, Flat Haze to fade one of the containers, and the flat haze with a variety of thin paints to build up grime on the car.
For the Canyon Road diorama which will be for modern equipment, I wanted to have a couple of options, so I bought a Rapido 53′ Well Car when they recently announced a new run, on, the “On Track for a Cure” cars, Rapido is making a donation from each to a Cancer Research Charity, so its a good cause to have an unduly standout car in pink. My other modern car is an 89′ enclosed autorack. I am working on plans for what I want to do with weathering it, that will be a future post. For now, I have the well car, and some containers to weather. The CP Containers come in two packs from Rapido, I think, I am only going to use one, and will be finding another lines container to ad some variety. For the CP container, I wanted to try something else I had not used before, the “Flat Haze” paint from Rapido. This is a clear coat, but one that is hazy, or designed to dull colours. None of the containers I see when I am out are perfectly bright red, so this seemed to be a good way to take the shine off. I also put a coat on the pink of the car to take the edge off. As you can see in the photos above, you can definitely see a difference between the hazed and unhazed containers. For the car, the truck sideframes were weathered with Bragdon Powders, they seem to stick OK to the trucks, something which can be an issue, and given they will rarely be handled, I don’t think they need to be clear coated. For the car, I used a number of dirt colours from the Iwata set sprayed from the airbrush above and below the car, to build up grime where it is most heavily built up on container cars, along the underbody and end platforms of the car. I am really happy with the results, the airbrushed paints are thin, so they build up slowly, which means you can do a couple of passes, see how it looks, and decide if you need more or not, much better than using unthinned paints and trying to apply light coats, using super thin paints means its almost impossible to over cover, something I have problems with painting solid colours and building them up, I have a heavy trigger finger and want to see things go from unpainted to painted in one pass sometimes, not the best technique!
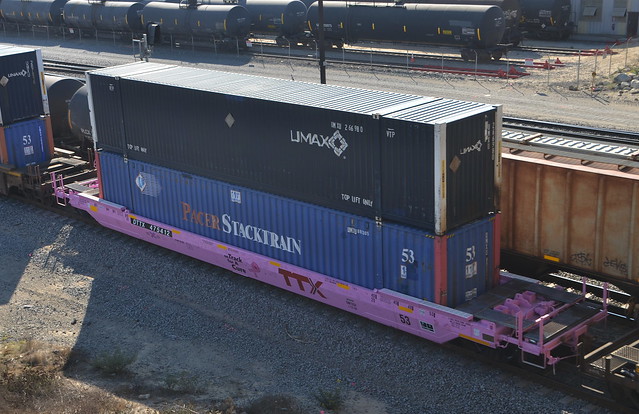
A picture of DTTX 475412 from Flickr (not mine), showing the places grime builds up, and the double stripes near where loaders drive up to the car.
Weathering is not just about making models not look all like they aren’t straight out of a box and clean, it is also about making them look like the real car. As you can see in the above reference photograph, the TTX On Track for a Cure well cars develop a distinctive double line of grime at each end of the car by the container length markings. Given where they are, and that they are in basically the exact same spot on all the cars on both sides, I have to assume they are from a container crane of some sort when the cars are loaded/unloaded bumping up against the sides. So now that I have done general weathering to take the shine off the pink and make it look used, how do I recreate these streaks?
That is easy, using the oil paint and odourless turpenoid streak technique. Using the grey oil paint, and a fine brush, I applied dots of grey paint at the top of the side sills. Then, with my wide brush, using vertical strokes, I pulled this down the side to create a narrow streak. It took a few attempts, but this is the glorious part of the oil paints, if you get it wrong, the brush with turpenoid will take it all off. You have a lot of time to work, and the paint will re-activate. In all honesty, the first pair of streaks took four or five attempts to look right, the second one or two, and the third and fourth on the other side of the car took a single attempt. As with so many things, practice improves and eventually makes perfect. And with the oil paints, you have time to do something, review if you are happy, adjust, outright remove, and try again.
Applying grimy stripes to a well car. After base weathering, with dots of oil paint applied, and with the dots pulled down into streaks.
So, with that, it has been a productive week, I have applied things I have learned, and begun to understand how they actually work, and where I still need to learn and experiment more to improve my application of the techniques. I have plenty of models built and under construction with which to experiment and advance my skills on, so on we go!
Some views of the weathered container car on the Canyon Road Diorama. I really need to get back at weathering the track and doing scenery!