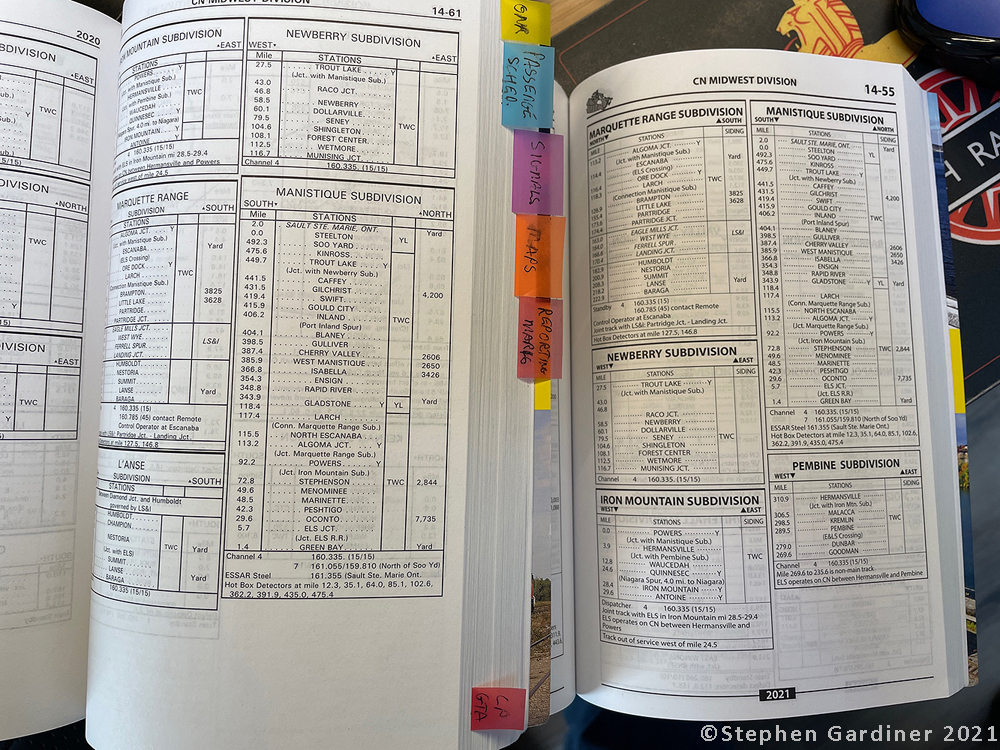
So one of the most useful tools if you are a railfan in Canada and spend any time out chasing/waiting/watching trains, the Canadian Trackside Guide. This annual publication, now in its 39th year is both an incredible tool, and an incredible record of the changes in the railways of Canada. I use it as a source of information for where I am out looking to know where I should hear automatic radio equipment communicating, for what trains I might expect to come by and what their numbers are, and for “ticking”, or marking which locomotives or other equipment I have seen in any given period. I say period, as ordinarily I have bought one about every 5 years, and for some reason, I got rid of my older ones. I currently have a 2015, 2020 and a brand new 2021. With 2020 bringing a year where about the only thing I could do to get out of the house was go railfanning (nice easy social distancing activity), my 2020 guide got a workout, and so I did buy a 2021 version, and I’m glad I did.
Brand new 2021 Trackside Guide and my 2020 edition. The 2021 hasn’t been flagged yet with stickies to easily find the most frequently used pages.
The format and appearance of the guide hasn’t really changed that much over the years, at least not before the 2021 guide. I opened it up and quite literally went “wow” out loud. This years guide, has had some subtle, but really nice improvements made to it. The font is slightly larger and clearer, and in the roster guide sections, there is shading blocks to help break up listings and make it easier to use. These for me are small, but really nice formatting improvements that will help me see and find things as I am out railfanning in 2021 and into the future. I don’t know if I will buy the guide again in 2022, that’s a future decision,
A couple of samples of the 2020 vs the 2021 guide, the slightly larger clearer font and shading are really appreciated by me.
The Canadian Trackside Guide is published by the Bytown Railway Society in Ottawa. As of the date of my posting this, they still have copies left, but if you are in Canada, your local model railroad store probably has some, and I know a lot of museums do. The Toronto Railway Museum has both 2020 and 2021 versions available through the museum store.
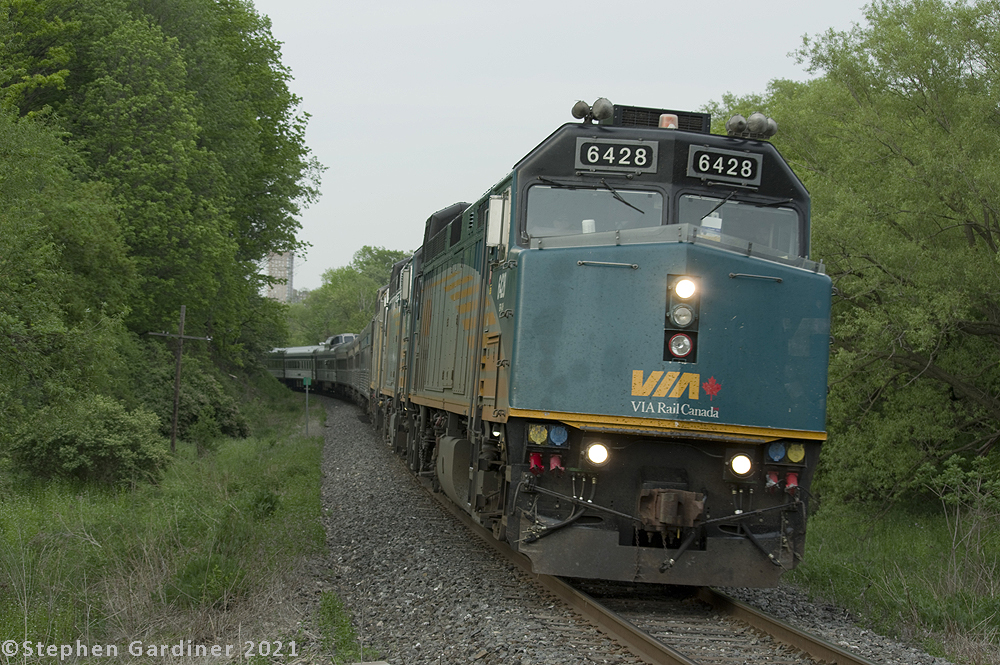
Late post, late train, but much needed to see train as a sign that normalcy is slowly returning. The first eastbound Train 2, The Canadian of VIA Rail is seen here at Pottery Road in Toronto on May 21, 2021, the first one since March 2020 and the start of shutdowns for the pandemic. A welcome sign that things are slowly getting better and that someday travel for leisure may be a thing again. A video of the short 3 locomotive/11 car train and a couple of more pictures are below.
VIA Train 2, 3xF40PH-2D locomotives, 1xBaggage, 3xCoach, 1xSkyline dome, 1xDiner, 4xManor Sleeper & 1xPark Dome (Glacier Park).
I am of an age, where one of the first big event movies in what has become a golden age of Superhero movies on the big screen was 1989’s Batman, directed by Tim Burton and starring Michael Keaton as Batman, Kim Basinger as Vicky Vale, and Jack Nicholson as Jack Napier….ok…The Joker :). This was one of the first movies I remember being super excited for (I was 10), and having toys come out with it. I loved the Batmobile, it was just awesome beyond all conception to me. Both our wedding anniversary and my birthday were in the past few weeks, and my wonderful wife knew I’d been going back and forth on buying myself a massive LEGO set for months, and given we can’t go out for dinner or get away for a weekend as we normally do for our Birthday/Anniversaries that all fall within a couple of weeks of each other, she offered to buy me said giant LEGO set. So with that, yes, this is another “That’s No Train” project, past ones can be read about here: 1, 2, 3, 4, 5, 6, 7 and 8!
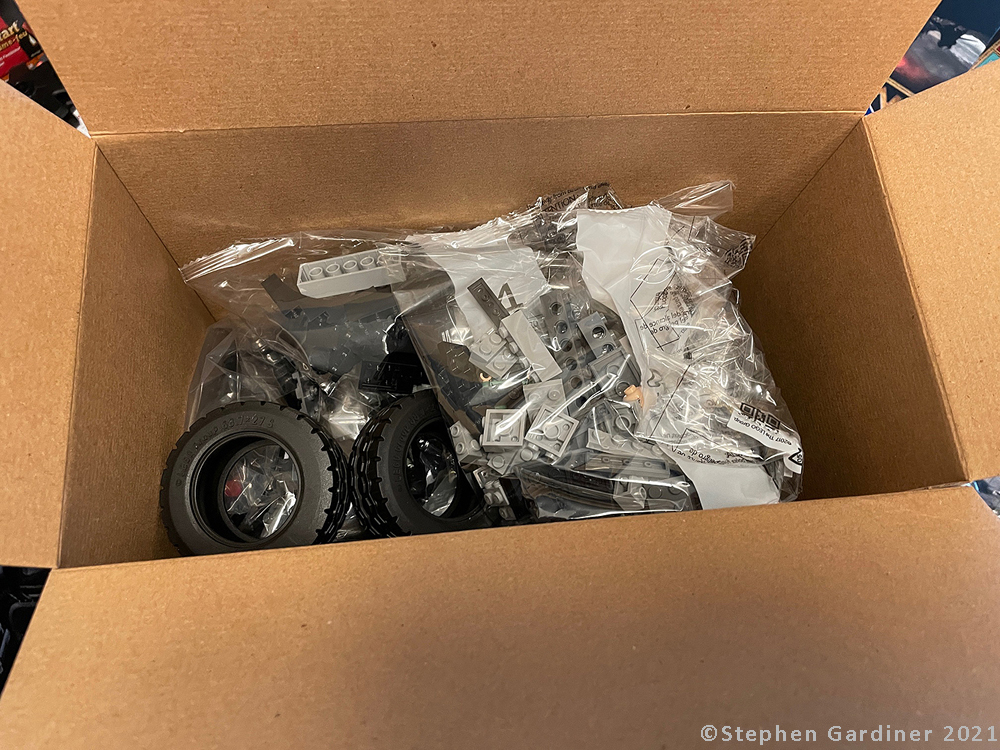
You know you are loved when someone gives you 3308 peices of LEGO for your wedding anniversary/birthday present.
This is LEGO, not rocket science, but it filled my birthday that conveniently fell on a Sunday nicely. I find building LEGO to be incredibly soothing. There is something satisfying about finding the pieces in the bags and clicking them together. There is also something incredibly easing know that LEGO’s production and packaging has virtually eliminated the possibility that you are missing a piece. There are ample books and TV shows out there on LEGO’s philosophy and manufacturing process, but it is immensely impressive to me that as part of their growth, they also focused on the little thing, like making it such that no kid who gets their product (big kid like me or actual kid) can’t finish building their toy because it is missing parts. As you can see in the pictures that follow, there were 24 numbered bags for each stage through the very thick book with 614 steps, and two more bags of oddball parts plus the tires loose in the box!
The first 3/4 of the build, from unboxing to my dinner and cake break.
Again, one of the nice things about LEGO is that it goes together and comes apart. I did make some mistakes through the build, but when you find them, it is easy enough to disassemble a part of the set to fix your error. I started around noon, and stopped around 6 for dinner. I don’t know that I would say I am the fastest LEGO builder, but I am certainly not slow. I find it very zen working through the pieces, and once I start I just kinda get in a groove and keep going.
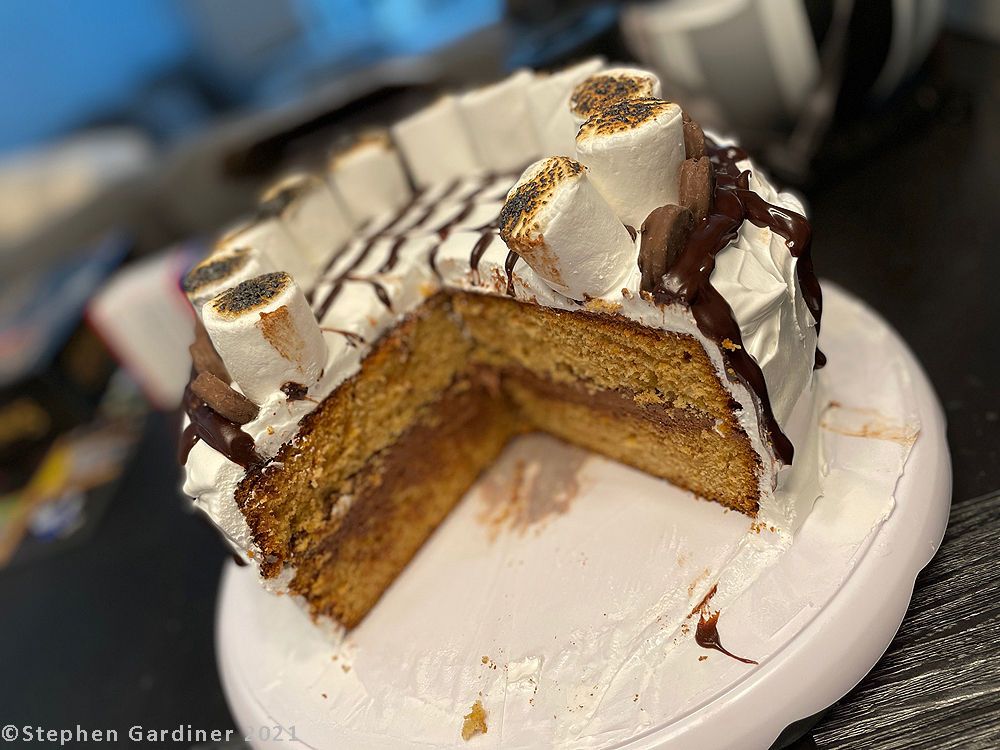
What’s a Birthday without some cake? In this case, home made S’mores Cake from my wife. It was awesome.
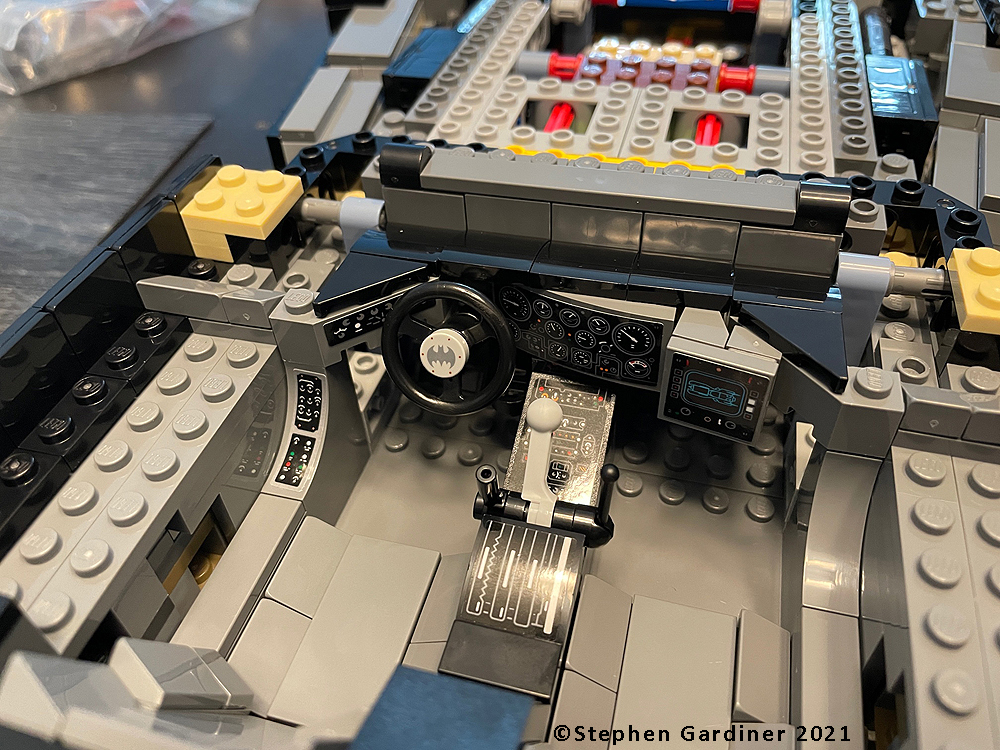
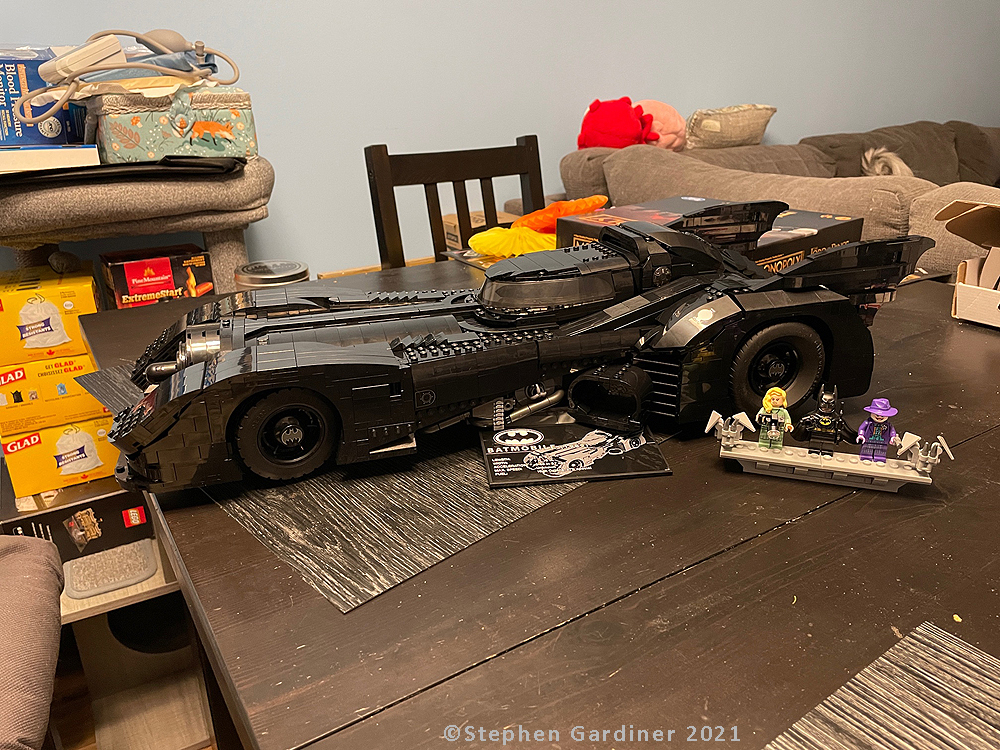
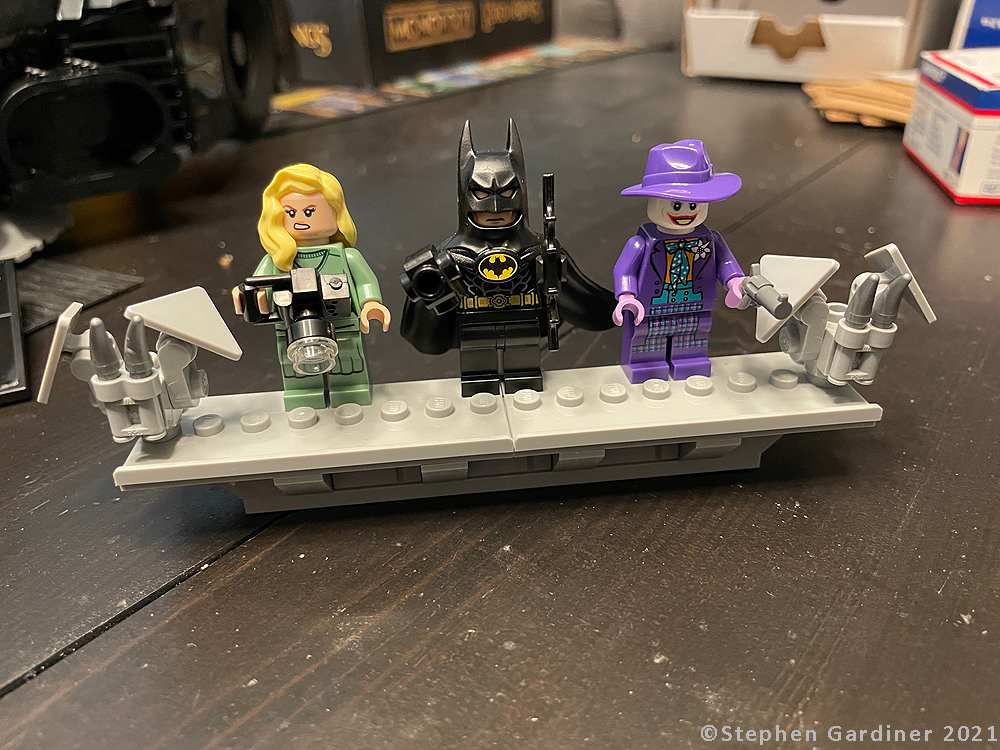
After a couple of hours break for dinner and desert, and some porch visits with friends, it was back at it and finishing the massive build in a day. I have to give Lego a lot of credit, they really do put a lot of effort into making these large sets look like what they are, and have play value if you were so inclined. On the Batmobile, the steering wheel in the car turns the front wheels, the canopy slides and opens, if you turn the jet exhaust at the back, it makes the twin guns pop out the top like in the movie. It also came with three minifigs of the Joker, Batman and Vicky Vale, along with a little stand for them as if they were at the top of the Gotham Cathedral at the end of the movie.
Gallery of the finished LEGO Batmobile. yes, its big. Its approximately 8″ wide by 23″ long. And every bit is awesome!
This is one of those things that it was absolutely the right thing at the right time. Something that was both fun and soothing to fill some hours, of course we watched the 1989 Batman movie while I was building it, and at least in my mind it still stands up for what it is. Some of the effects maybe haven’t aged great, but so much of it was practical in an era before CGI, it actually still looks good as it doesn’t show the age that early CGI does as technology has rapidly advanced.
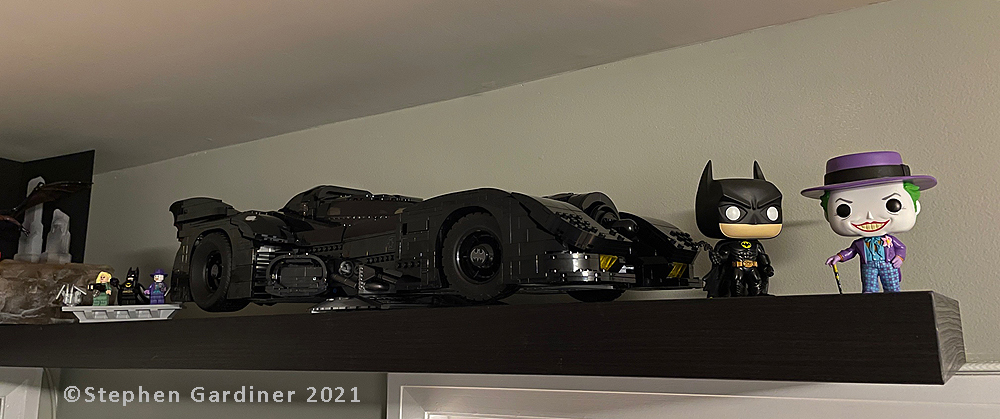
A present so good it needed a whole new shelf! LEGO 1989 Batmobile with my 1989 Batman and Joker Funko POP Vinyl figures.
So with that, I actually have no projects in the house that are not trains! Everything is either the Liberty Village Layout, the Canyon Road Diorama, or other miscellaneous models I’ve never finished or want to upgrade. I am going to try and keep it this way for a while, partly so I make some serious progress on the trains, but also because I don’t really have space for anything else, or to add more shelves, so the next “That’s No Train” really needs to be something I want to do. No doubt in time when I need a distraction from Trains, something will inevitably present itself.
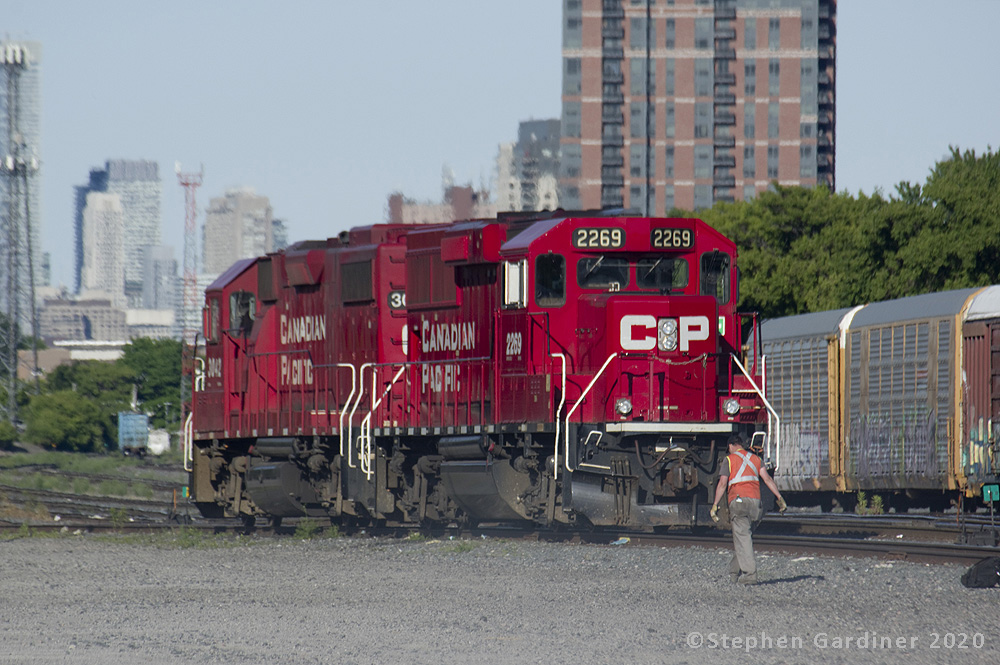
A couple of weeks ago I posted an omnibus update that had some pictures of my second Atlas Alco S-2 for the Canadian Pacific Railway fleet on my layout. CPR S-2’s were pretty much ubiquitous in Toronto from their introduction in the 1940’s through the decline in local freight service in the 1980’s. As such, having two made sense for my layout, but I wanted them in two different paint schemes, the short lived early 1950’s “smiley face” maroon that I have with 7020, and the 1955 on “Block” lettering scheme in the more familiar CPR Maroon/Tuscan and Grey (I do not get as pedantic as some on what CPR’s red colour was actually called!).
A pair of CPR S-2’s in Toronto in 1955. These are the two schemes mine will reflect. I am modelling 7043 in the block, and my “smiley face” is 7020 (though mine doesn’t have eyes. Even in the 1950’s people anthropomorphize trains! Picture from Mountain Railway CPR Roster, originally via Bill Sanderson Collection
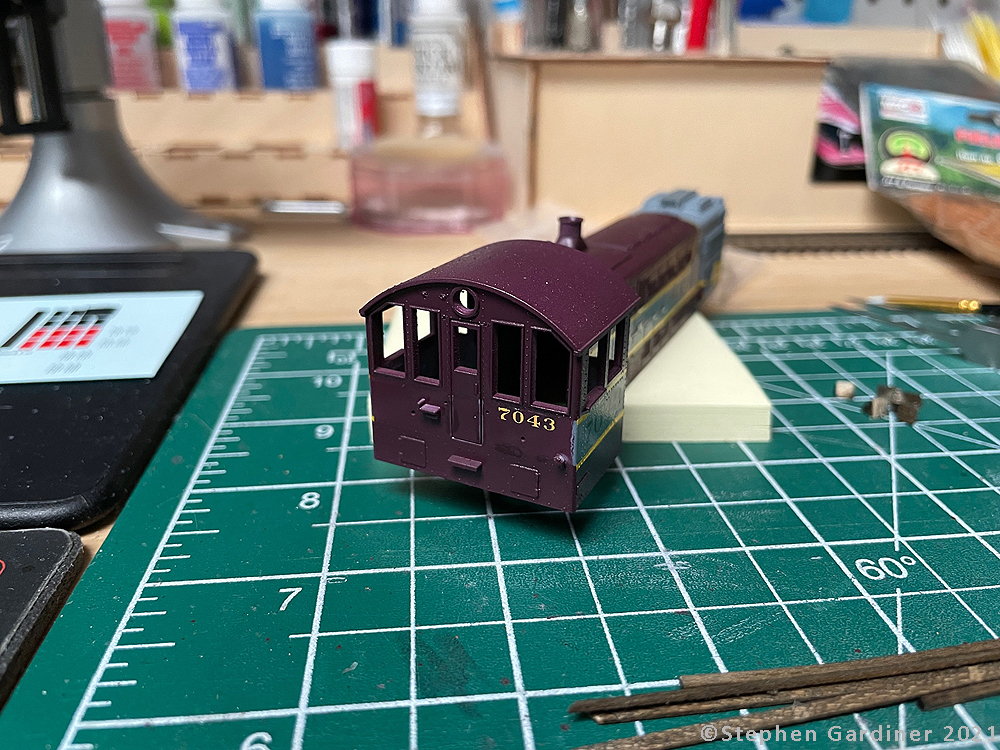
After I started decalling my 7043, I noticed I had made a painting error. I continued the grey band around the back of the cab. This was wrong, the back of the cabs were all maroon. So I had to carefully mask and re-spray the back of the cab so it was the proper colour all the way around. With this done, applying the decals was pretty much standard stuff.
In the booth and after correcting the back wall of the cab
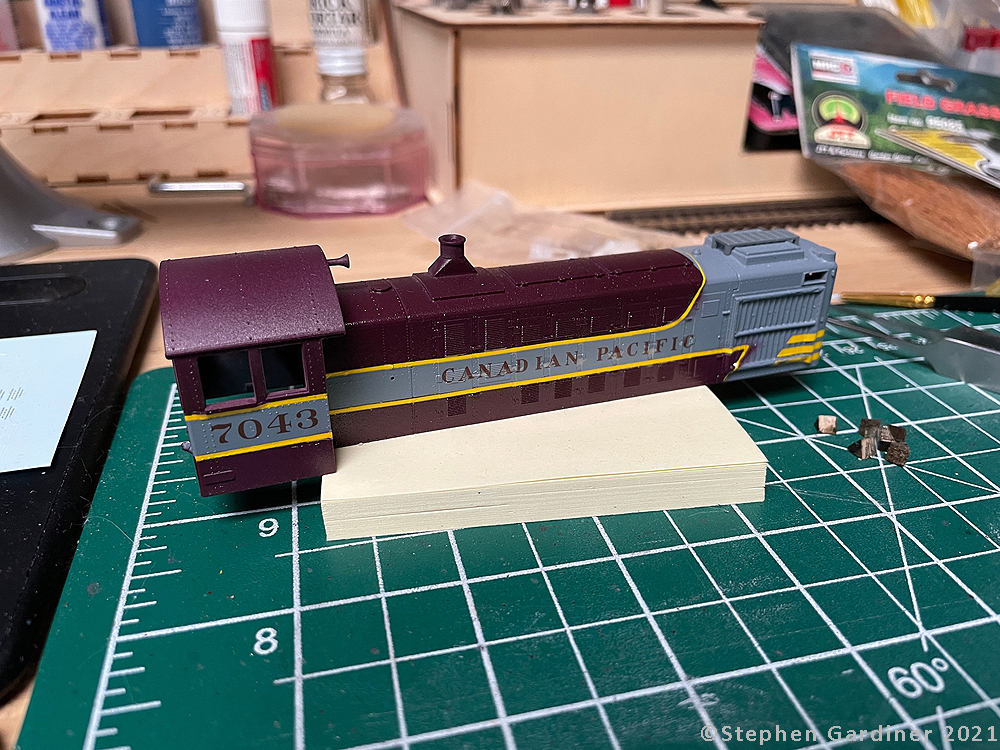
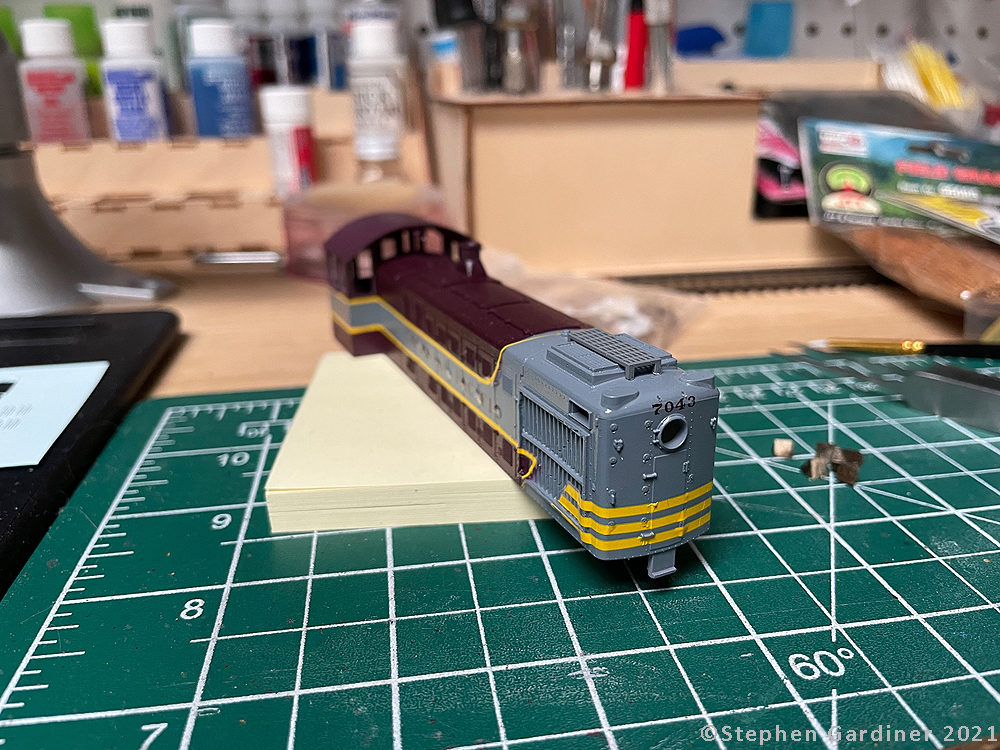
This paint scheme has another challenge for me that I wouldn’t be sure I had gotten right until I started Decalling. There is a yellow stripe separating the maroon and grey. When I masked to paint, I had the decals to use as guides, but until the masking was off, and the decals were going on, I wasn’t 100% sure I had gotten the curves and angles right. It turns out, I was pretty much close enough that its not noticeable where there are issues. Most of the issues are on the radiator grills at the bottom, and can be hidden by weathering. You can just see it in the pictures, and its less noticeable in person.
Putting on the stripes separating the primary colours.
For those keeping track, this project has been a little bit electrically cursed, and it has been daunting me in terms of actually getting to making a second attempt at installing the DCC. Fortunately, thanks to a friend who runs a business producing resin kits and building models for others, I am going to send out the locomotive for the DCC installation to someone more competent than I. I want to continue building my skills, but at the moment, the right option is to send it out to someone who can get the job done more reliably than I can. Before I send it down, I am going to finish the body work in terms of getting the decals on, clear coating them, adding some light weathering and then getting the clear glass and such back in, so that when I send it down and the DCC is done, the body can go on and it hopefully doesn’t have to come apart again for a while.
7043 decalled and ready for clear coat and weathering.
I am quite pleased with how it looks. I just haven’t had the motivation to get the paint booth out and put on flat coat and start some weathering. I will hopefully find that motivation this week, but as it seems spring and nice weather is finally sprung here, sitting outside enjoying the warmth and going for bike rides after work has become more appealing than staying inside working on trains!
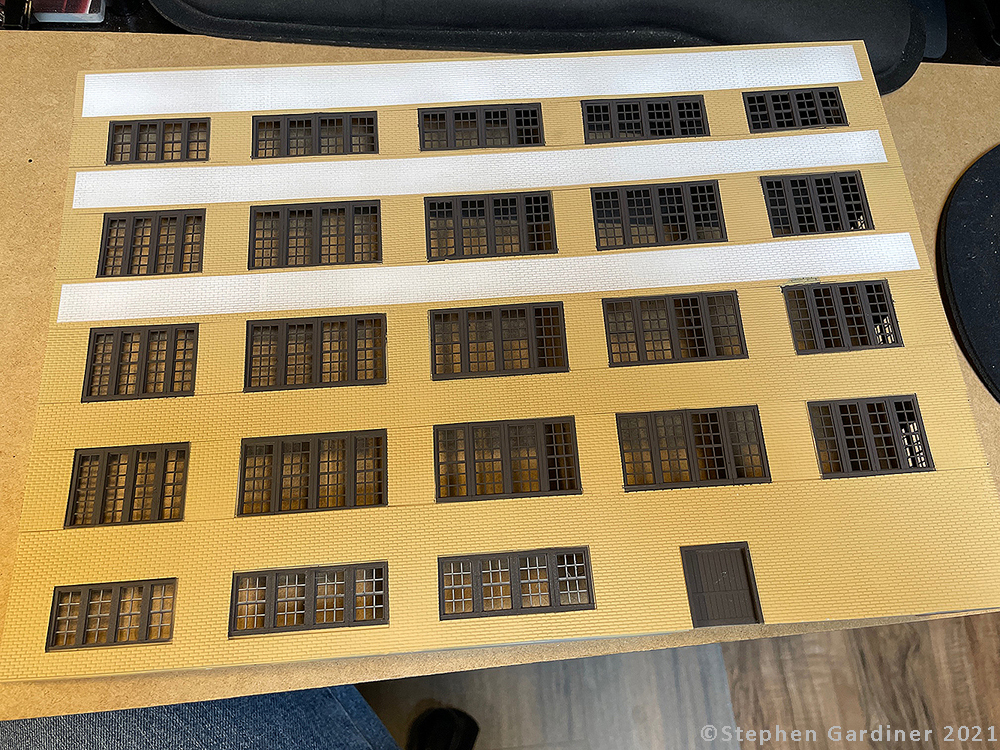
Continuing to make progress on the structures I have built for the layout, one is finally seriously nearing completion. With the windows painted on the Brunswick Balke Collender factory, the next step was the three large painted signs that adorned the southern facade of the factory. Once these are done, I can move on to weathering and getting the building with a good coat of mid 1950’s soot that adorned all of Toronto back then.
First stop, the paint booth with decals for the black part of the sign printed on our injet, and spraying the white blocks for the text onto the walls.
For the signs, there are many different ways to do them. My chosen way is to paint the white onto the walls, and make decals for the black portions. I have clear decal sheet for doing this kind of thing. I know you can get white decal paper, but my past experience with it is that you get white around the edges when you trim your decals to size and apply them. Using clear paper, means that if there is clear carrier at the edges, it can blend away.
To make the decals, I used good old Adobe Photoshop CS3 (I don’t have a computer capable of running anything more modern, nor the inclination to pay a monthly user fee forever and ever) to produce them at 1:1 size for my structure after measuring it. The top sign has been restored, the lower two were not when the building was recently renovated, but I fortunately have a single shot I took in 2005 where you can mostly make out what the two lower signs said. Between that, and some internet investigative work on Brunswick Balke and their old drawn images on corporate letterhead, I am confident that if anything is wrong, its not very wrong.
Decals going on. They are so long they need to be done in two parts. After the first half was down, I trimmed the second half to minimize overlap while leaving myself clear alignment points at a letter to match the halves.
For the decals, once they are printed, the need to be sealed to actually go in the water and slide on. I have an old rattle can of Testors Decal Bonder spray from my first efforts at making decals years ago. A little goes a long way. To be honest, I probably even in my couple of light coats applied too much, but given the size of my decals, a thicker coating so that would hopefully not tear (spoiler, they did not tear) seemed wiser than thin and having to fix issues.
2005 compared to my model. Now it just needs weathering. Somewhere between the pristine look the model currently has and the completely weather-beaten pre-restoration look of 2005.
The signs have worked out pretty much perfectly. The white paint shows the brick pattern clearly, and the black home made decals have mostly settled in to find the nooks and crannies to also look like they are paint and not a decal. They need a bit more work in a few sports with a pin and some microsol to get in underneath and finish the job, but walking into the layout room (or just down the hall toward it), this building is very prominent as you enter the room, and every bit of movement forward re-affirms my decision to build this first and work on advancing this area of the layout as seeing it continue to move from vision to reality keeps me motivated on the numerous other projects, even if I haven’t been getting as much done of late on the layout as I might want to with my focus being spent on my “distraction diorama” that I needed just to do something different for a bit to feel refreshed and re-find motivation for layout projects. After all, the 80+ windows of Hinde and Dauch are still waiting for me to cut the openings and cast the windows before I can do the next set of painted wall signs there, which are much bigger than these ones are!